Saturday, December 1, 2012

Can you be persuaded? Bulletin Board


This is a very simple bulletin board but with a lot of information and use. Not to mention how proud students were of their creations and work. This was a great way to end a unit on persuasive text and making connecting it to them, adding a personal meaning.

Students were to create something with materials I provided them with (materials that I had in the classroom and I had enough of for the entire class). In this occasion I provided the students with a pipe cleaner and a clothespin. The students were not allowed to add anything else to it but color the clothespin. They were allowed to put it together or use it as two different items.
After creating a product the students were to create an ad to persuade people to buy their product. The ad had to contain pictures, a name for the product, and persuasive vocabulary.


The students and I enjoyed this project. The students thought long and hard about what to create with the two items and came up with some neat products. I had bug catchers, hammers/hair extensions, lizards, basketball courts, item catchers, and many others. 

This bulletin board was not only a success in my classroom but inspired others to create something similar. One of my teammates gave students vegetable cards and had the students rename the vegetable to make them more appealing. In addition, the students created an ad for the vegetable to persuade others to eat them. 

Monday, October 8, 2012

Rounding

This rounding technique was not created by me. I was actually taught this technique by one of my team mates. 
This technique requires students to reference to a chart. Which will guide the students to getting the correct answer for rounding. It helps those students who struggle to visualize if to move up or down on a number line. In addition it helps the students who can not visualize the two numbers the rounding number is between. This technique has helped me have a better success rate with teaching rounding. I have also discovered that once students become proficient at rounding they soon can visualize the process and quickly round. Without doing the steps on paper. 
I have taken this technique to a different level by creating a poem describing the steps with catchy phrases or names to help students remember. That gave me a higher retention of the process with my students, but until this year I took it to the next level by creating a story and more relatable to them. My students loved the stories and many needed that to remember and understand. 

After creating my story I still had a few who could not "see" the steps so we created a motion picture of the steps. The simple steps were placed on a sentence strip that was folded into eights. Each box had the step on top and then a picture telling the story. 
After the story was drawn on the sentence strip, we took a black paper and cut two slits the size of the boxes. Students placed the strip through the slits and there they had their motion picture. My students were proud and loved their "movie." The title I gave my students was How to Round my students added The Movie. Some of my students even created an actual story with characters and plot to go along with it. 


You can get the story and steps here

Sunday, October 7, 2012

Story Elements


Last year in second grade I had the great opportunity to create a unit using the Common Core standards. I have taken it to the next level and made general activity sheets where character's names and story titles. I am excited to use these next quarter with my students. 
Flash Cards

Anchor Posters


Activity Sheets


This is an extensive story elements. This unit covered the 5 W's and H along with other important concepts that fall under each category. The unit covers minor/major character, flat/round character, comparing/contrasting characters, would you rather?, problem/solution, predicting, setting, character trait, and many more. By the end of the unit the students are familiar with the characters. 

Sunday, September 16, 2012

Referencing

As part of my Master's work I have learned how to reference my sources using the APA 6th edition style. It has been a learning experience and I am excited to share that learning with my students. 

We have started our Common Core Unit on bats and as part of our final assignment the students will write a report about a particular bat and reference the source for their information.  

I started by teaching how to reference a website that they would use. Students learned the basics of referencing a website and where to find the information that they needed. 
Once my students understood the basics of referencing a website (since that is what we were using at the time). I continued to build upon that with the basics of referencing a book. Just like the website reference students did not only have to learn how to create a reference but also how to find the components in the book. 
Once all of it was put together I am proud to show what my 3rd graders have learned. They did not only learn about bats, learning about the different information that is found in a website or book, but also APA formatting for referencing. I am a proud teacher. 

Tuesday, September 11, 2012

Yay so smart!

Two weeks ago I thought I was the greatest invention of all. Until I googled my idea to find out it already exists, but I just had time to blog about my experience. 

This is how it all started. For 6 years I have taught place value and value in a similar way with great success, until this year. I have my place value and value poem that explains the difference. I have my movements for my TPR and it always helped my students' brain to click into place and get it. Not this year. I don't know what is going on. As I was paraphrasing it to my students, I got a great idea. This is how it all started. Place Value is the location of the digit, and value is how much is inside the house.  Some AHHHH and some blank looks. Ok each digit is a house, the place value is the houses address, where the house is located at. Is it located on Street A and B Ave (I said actual streets that students can relate to) or on Street C and Ave D? My students said Street C and Ave D! I just had to laugh. 
Then my lesson continued to this board where I took my drawing a bit further to explain what I was saying. The thousand houses are located on Thousand Ave and the other half on One Street. The stop sign is the corner of the two streets where you have to stop. The value is how much money each house gets. One's gets only one dollar bills. How much does that house have?  Tens only gets ten dollar bills. Hundreds get hundred dollar bills. Thousands get a stack of 1,000 dollar bills tied together. Etc.  The majority of my students finally understood what they were doing, and a light bulb went on. 

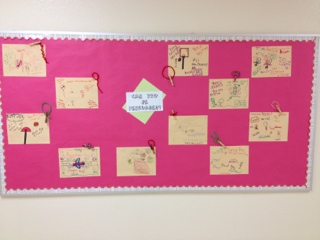
To get a true assessment of their understanding and grasping the concept, for homework they had to explain the difference between value and place value. These are some of the examples I got. One of my students wrote a paragraph worth.
I thought about this next idea on my way home, to later find out it already exist out there. But mine is a tiny bit different from the rest. The ones I saw had one large house for that group of places. In my version each place is a house and the groups of digits are categorized by the street it is at, and the stop sign which I believe helps a lot of my students. 

How to use it? 
One of the most challenging things my students have had to do is take a large number that is in word form and convert it to numeric form. The comma is the stop sign so everything on the right of the word thousand goes on the right of the stop sign because the stop sign (comma) says thousand  (Thousand Ave) and everything on the left of the word thousand goes on the left of the stop sign. This way the student only focuses on the smaller number that goes on that street. They get thrown off by double hundred and the thousand words. Students get to write on the mat with dry erase markers! 
You can also have the write the numeric form and then use the same strategy and turn it into written form by doing one street at the time. (Remember the stop sign or comma already has the word thousand on it).

Challenge your kids more or practice more skills? I had students write the value of each digit at the bottom or the house under the digit. Once they finished they added their plus signs between the values and they had expanded notation. On top of the roofs they drew the model for each place and then they had their model. 


How to Make? Easy!
You only need (per student): 
1 Long construction paper (any color except red)
2 regular size color paper
1 Sentence strip
1 red construction paper or regular paper strip

How to put it together:
1. The long construction paper will be the background, it has to be horizontal. 
2. At the bottom of the paper leave a tiny space of construction paper and then glue the sentence strip onto the construction paper. (The writing portion of the street should be showing that will be the street and allow the students to write 2 lines of words)
3. Take the construction paper and fold it in half. 
4. On the sentence strip you will add the stop sign/comma. I had the students cut a square where they wrote stop and glued it onto the "side walk/on top of the writing area) Then take the sentence strip and fold it to make a J or comma looking figure and glue it under the stop sign and write the word thousand on it. 
4. Fold one of the color papers into 8ths. 
4. Cut out the rectangles. 
5. Using only one color place 3 rectangles on the right side of the stop sign. Make sure they fit with a tiny space between them before gluing if they do not fit cut off some of the sides. When you do glue them they must be on the sidewalk. They should not pass the sidewalk, that will be the writing area. 
6. Using one of the same color rectangles cut it into a square. Once it is a square fold it into half diagonally, then half again, to make 4 rectangles. 
7. Glue the triangles on top the rectangles and write the "address"/place value of the house.
8. Repeat steps 4-7 to do add the houses on the other side of the stop sign. 
9. *Optional* You can have the students write all the forms to express a number (I really did not use that part). 
10. Laminate, enjoy, use, and learn. 
Feel free to use my not so original idea. : ) I guess everything you think up someone else had also thought about it before. Hey that is life! How they say ALL great minds think alike, right? I hope you like this project and it is beneficial for you and your students. Let me know if it works out for you. : ) Smile In Life. 

Sunday, August 26, 2012

Beginning of the Year: "I'm Allergic to Yelling"

The beginning of the a school year can be a bit stressful. New students, new challenges, and new little ones to love and nurture into intelligent citizens. One of the nice incentives I have this school year is having the prior knowledge of most of my students. Last year I was teaching second grade and had the opportunity to go back into 3rd grade, with some of my second graders and some I knew from the other second grade teachers. The benefit of being able to do that is that you know exactly what they were taught and what is new. That way when the students are trying to pull the "I didn't learn that" card you know that it is not true. : )

I was excited to begin this year with my smartiesfied classroom, a fresh start, and most importantly being part of a new adventure. We have started the first year of implementing the common core standards in 3rd grade. I was privileged enough to have the opportunity of doing that in second grade last year, but now I get to take all my ideas and take them to a new level in third grade. 
As any new year the basics of a successful year is starting off the year with the procedures and routines. At times it seems boring and time consuming but in the long run it will all be worth it. Especially since the students will not have any excuses for doing certain things. To help with this process this year I have tried several new things that seem to work well so far, as we have just finished week two. 
One: Successful Student Handbook

In my Successful Student Handbook students will be provided with the Task Analysis of how they are expected to listen, think, talk, and work. The students also have the steps on how to get materials in the classroom, the task analysis of our two classroom rules, and the school's vision and mission. We go over each page and we even practice how each of my expectations look.We also went through our school's mission and vision, changed some words around so that the students can understand it, then the students drew a picture of what the vision and mission is to them. This was a great activity to do with them. I loved it, they did too. Every time they see the vision and mission around in the school they always refer back to the handbook. The students are keeping the handbook in their desk, so that they can reference back to them whenever they are not being successful or need a reminder of how things work in my room. This is also great for new students, so they can review it, and gather important information we tend to review with them. (The handbook idea is an extension of a post I previously did but this time it has the cover with it. I am not adding my class procedures as teachers run their classroom's differently and the school's vision and mission is different. If you would like to see them please let me know. I will be glad to share). 
You are able to get these free HERE


Two: Rules, Vision, Mission Everywhere
To go with my Smarties theme, I created posters where the rules, vision, and mission are on a smarties candy. I just love how it looks, and the students are constantly reminded about this information. They are able to see these in the classroom, and when they exit our class. 


Three: Smarties Graph
To built upon our Smarties Pride in our classroom, I decided to do this smarties graph. My students just loved this activity, plus it allowed us to see all the different types of Smarties Candy and the different colors. I will not take credit for this activity since I had seen it somewhere online. I can't remember where to give them credit. I just took it a bit farther to include our 3rd grade standards. 

Each student received a Smarties Candy, some students had the same type of Smarties Candy and some had different ones. The students opened their candy and sorted the smarties into color categories. After they categorized the candy they created a graph (by following teacher instruction and using prior knowledge) to represent the different candy colors. Once they finished their graph we added the key and our title, How many Smartie candies of each color are in _____? and they glued the candy wrapping to represent their type of Smarties. 

That wasn't all though, after they finished their graph they were to create three questions that they could answer using their graph, and on the back of the paper they wrote their answers. 
This was a great way to built upon our class theme and name, not to mention a great way to do a mini lesson on pictographs. This will be a great building background for our future pictograph lesson. 


I wish all of you a happy back to school week, month, and year. A quick funny story one of my students tole me. "Mrs. Grijalva I'm Allergic to Yelling." Let's just hope none of our students are allergic to learning.


Friday, August 3, 2012

Smartiesfied

After 6 years of smarties and always singing our Smarties Cheer, I finally went all the way and smartiesfied our classroom.

To start off I started working on our Smarties classroom website. I wanted to personalized our classroom as much as possible so that my students could relate to it and want to go to the website for all the wonderful resources. One of the first steps that I took other than finding the correct free web host was to have my 12 year old niece, who is a wonderful artist, draw our class logo.

I wanted to do more with the Smartie theme but I was unable to find any classroom products to decorate and use in my projects. This resulted in my latest adventure.

SMARITIES BULLETIN BOARD


I know this looks a bit plain but that is temporary. Once school starts students will create a goal sheet on a circle to represent the actual Smarties candy. Once the students have finished their goal sentence they will draw a picture of themselves in the middle of the candy that will provide details about who they are and what they like. The smarties name plate will be used to place next to the students work. 
I will post an update as soon as my students complete their portion of the bulletin board. Stay tuned. 

All templates are provided or you here free. 

What do you think?

**********UPDATE************
Here is the final look for my bulletin board. With a constant flow of new students it took a while to get the board updated. Two more kiddos to go and I will have 100% completion. Writing the smartie goal really made mys tudents to stop and think about what they wanted to accomplish in 3rd grade. Not only that but now I have a way to keep them accountable for their learning and meeting goals.
After my smartiesfied year I decided to take it a little farther and make our school vision/Mision and classroom rules also on smarties candies. This has given my class a new look and the kids and I just love it.


Tuesday, July 3, 2012

Preparing for Third Grade


Now back in 3rd grade but with a new curriculum I need to prepare myself for this new challenge. Not only that but 3rd grade was next in my to do list in organizing the Common Core Standards as they drive me crazy in the unorganized manner that the math standards are placed in.  
I feel as if this document is easier to read and follow. Not only that but I have combined several standards explanations given by Arizona Department of Education. 
You can find it all in my TPT or TeachersNotebook store.
I hope you enjoy. 
         Common Core Standards

Saturday, June 30, 2012

End of the Year!

It's been a while since my last post because of my hectic life. Between the end of the year, moving back to third grade, end of the year, Master's, end of the year, two children, end of the year, doctors, end of the year, life, and did I mention end of the year.

So I am going back to third grade. You know that means a lot more project for me!!! I am excited the common core standards for third are more in depth and creates critical thinker from the students and most importantly the teacher. :)

To recap this last part of 2nd grade:
We did a lot of work and thinking this last part of the year.

We created and received a published book called What make you different? Thanks to Student Treasures who provided the publishing. The book turned out great, my students were excited, and most importantly they were extremely proud of their work.
http://www.studentreasures.com/publishingprograms/classroom/classbook/index.html

As I had mentioned before, we won the Word Girl viewer competition. At the end of the year we received our prizes and let me tell you there was over 400 students and teachers who were happy and excited.


We also did a unit based on the story Things that are Most in the Word. We read the story and then the students followed the books formula and created their own version of the book. This activity helped the students lean and understand what an adjective is. After that activity I switched it up a bit and made it for verbs.


The last project that I will mention is the wonderful study of the 7 Habits of a Happy Kid and the Leader in Me. I don't know why I didn't do this great unit before. The book that Cubby wrote is wonderful, it helped my students understand the habit and they were interested in the concept and characters.


What a great end of a 2nd grade year! Now to a 3rd grade year again.

Thursday, May 31, 2012

YAY! WE ARE A FINALIST!

In my previous post I had talked about the project we had finished for the "Have Fun with ACER" competition.


Now I am asking for your help.

My classroom is a finalist in a competition to win 30 ACER tablets for our classroom (I am working hard to get technology in my class). The competition had teachers submit projects that had something to do with the letters A.C.E.R. My classroom worked hard in this video, and are extremely proud of themselves. One of the funniest things was to see their ideas of what each thing meant, doing research, and most importantly working together. They used an iPad, flip camera, iPhone, and digital camera to gather everything needed to create the video.

Please vote from every email you have, but only once from each. If you can and would like please share it with others. My class will be working hard to get votes for the one thing they are proud of accomplishing. : )


Thank you in advance, our class project is Saving Our Planet:.


Saturday, May 12, 2012

Saving the Planet

As a project and part of a competition, I challenged my students to come up with an ideas for our unit. We had been studying and starting a recycling program in our school so I figured that we would do a video about that.
Part of the contest was to use the letters  A C E R as part of our final product we decided to go with Appreciate Nature, Conserve Resources, Environment Safety, and R³ for reduce reuse and recycle. My students were then split into groups and were responsible for thinking of how to show a message for their concept using technology. They could use an iPad, flip camera, or a regular camera to complete their part. I then put it together using Windows Movie Maker.

Here is our final product:

You Tube:


TeacherTube (since many school's can't use YouTube at school):


My students had so much fun thinking about their ideas and actually realizing them. They are extremely proud of their work and I am amazed with how quickly they learned to use the devices and to be creative. Now they have not only learned the concept but they have also internalized it, as they are constantly conserving our planet at school. : )

Friday, May 11, 2012

Mother's Day Projects

Projects that we have done in my classroom for our wonderful Smartie Mommies:
Mommy's Recipe Book:

Front Cover

My students enjoyed making this project for their wonderful mommies. This book has a semi hard cover with a beautiful design choosen by the child.  Inside of the book there is a variety of different recipes that the students cant ry out with their mom's.

Where did I get the recipes?
We have a nutrition program in our school where teachers teach different nutrition lessons and at the end of each month turn in the number of minutes spent teaching the nutrition concepts. I save them throughout the entire year and use then during our Mother's Day season.

How to create one? It is Easy!
You Need per book: 
1- 9 1/2 X 9 1/2 Scrapbook Page (Design)
7- 8/12 X 8 3/4 plain paper (can be colors)
1- 30'' ribbon or in my case I used yarn
2- 8 1/2 X 4 1/2 ceral box card board 
Liuid Glue

Steps: 
1. Fold the scrapbook paper in half. 
2. Open the scrapbook paper and glue the cereal box to the paper with a little spcae in the middle (I use a small popsickle stick so that the students leave enough space). 
3. Cut the corners of the scrapbook paper to make it easier to fold over. (the corner of the paper starting at the corner of the cereal box). 
4. Fold the sides and glue on the other side of the carbord to cover it up. 
5. On the opposite side of the scrapbook paper make a line of liquid glue and place the ribbon or yarn diagnolly across the book. (Do not worry if it does not glue all the way or if there is extra glue around it). 
6.  Glue a plain page to the top of the cardbord (the side with the string). Be careful to not go crazy with the glue as it may show. spread out the page to make it flat and get rid of bubbles.
7. Cut off any extra plain paper from the cover.
8. Take the 6 plain pages and fold them hamberger style like a book.
9. Glue or write recipes on the pages.
10. Using a book stapler (long one) staple in the recipe pages with the cover (Staple on the extra space between the cardboard).

After and Before Picture
Mother's Day R³ Bag

Using a reusable bag that was also part of the nutrition program I hot glued a piece of fabric to cover the logo and create a wonderful gift bag that mas multiple of uses.


Feel Good Flower Book:

This project was a lot more challenging than the rest, and it requires a lot of patience and time.

This was a bit difficult challenge but it is well worth it at the end. When the book is closed it looks like a small square. When it opens up a nice flower pops ups. Each individual section of the book looks like a flower. When the book is tied cover to cover it makes a great ornament.


What you Need for each book:
2- 2 X 2 card board or cereal box.
2- 3 X 3 scrapbook page
5- 3 3/4X 3 3/4 construction paper.
1- 17'' ribbon or yarn
Liquid Glue
PATIENCE


How to create the book:
1. Glue the cardboard on the back of the scrapbook piece of paper.
2. Cut the corners of the scrapbook up to the cardboard.
3. Fold the scrapbook over and glue to wrap the scrapbook on the cardbord. I usually put them under a heavy book at this time to dry and to make the paper stay.
4. Fold the 5 pieces of paper.
  *Fold one piece of paper at a time.
  *Fold hotdog
  *Fold hamburger, the open the square.
  *Fold into a triangle, then open the page.
  *The squares with the crease the crease folds in to create a mouth looking 
    things (look at the pictures).
My picture is opposite of what it
should look but I am just showing
what it should look like. 
5. Glue all of the folded papers on top of each other. Make sure that they are all the same direction. I like to say that the tip (only 1 fold) is the bottom of my paper and all of those have to be together.
6.Cut around the stack (except the bottom) to make a design like a flower. 
7. Place your cardboard with the scrapbook page face down. Put the sqaures tip to tip to look like two diamonds.
8. Glue the ribbon across the center of the two diamonds. The ribbon will be used to connect the diamonds and make it into a book.
 9. Glue the flower ends to the cardboard.
10. Let it dry.
The famous Scrapbook Corner
Cutting that you will need for both
projects. 

I realize that my instructions may be a bit difficult to understand. I am so sorry but I tried explaining the best I could. If you have any questions please feel free to comment and I will answer.

I will try my best to work on a video to show you how to make at least the flower book.
: ) Enjoy and Happy Mother's Day.